What is Vibe Coding?
Vibe Coding is a fairly new term, and I am going to show you how to start Vibe Coding in VS Code. To be honest, I am not a big fan of vibe coding. I think a person should learn how to code in the language they desire, and if he/she does need some help, that person should ask AI. That being said, let’s continue.
Vibe coding is the use of AI (artificial intelligence) models to create an application. It is about giving the AI certain phrases (or prompts) to have it code you an entire app. Your object is to get the AI to do all the coding (heavy-lifting) utilizing the prompts you ask it.
Although this may seem easy, you would be surprised how AI handles the instructions to produce the correct code. You can spend hours or minutes making an application depending on the instructions. The prompts you use determine how effective the code and AI is. In this project, we are going to create a simple app utilizing vibe coding in VS Code. Your first step is to download and install VS Code.
Setup VS Code for Vibe Coding
To download VS Code, you can visit https://code.visualstudio.com/download
directly, or you can used my preferred method–use the winget command.
Simply, open up the terminal and type:
winget install Microsoft.VisualStudioCode
This will download and install Visual Studio Code. After downloading, you need to launch it, and install our AI assistant, Github Copilot, so we can start Vibe Coding with VS Code. To do this, do the following:
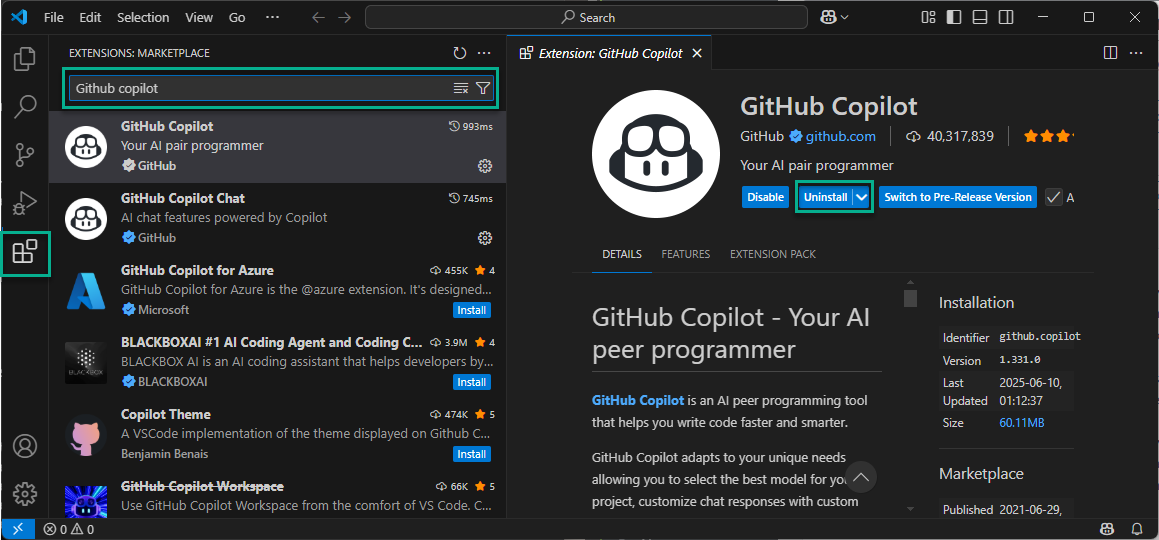
First click the extensions button on the left-hand pane. Second, type in Github Copilot in the extensions pane. You should see the list populate with extensions that match. Go ahead and select the Github Copilot extension, and finally click the install button. You should now be setup to start Vibe Coding with VS Code!
To familiarize yourself with the very basic usage of Github Copilot, I recommend you read this article by Microsoft:
Get Started with Github Copilot for VS Code
Lets start Vibe Coding with VS Code
The app that we are going to vibe code is going to be a simple app that searches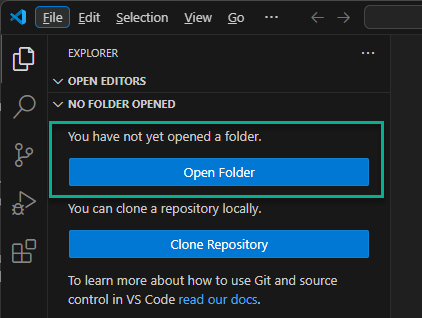 the Slickdeals RSS to find us a deal on the item we are searching for. To start, create a new folder in your documents and call it dealFinder. Next select Open Folder in VS Code. Once the folder is open, click on the Toggle Chat button (see below) to open up Github Copilot Chat. This AI Chat pane is where we will do most of our vibe coding in VS Code.
Here is a picture of the general layout of VS Code:
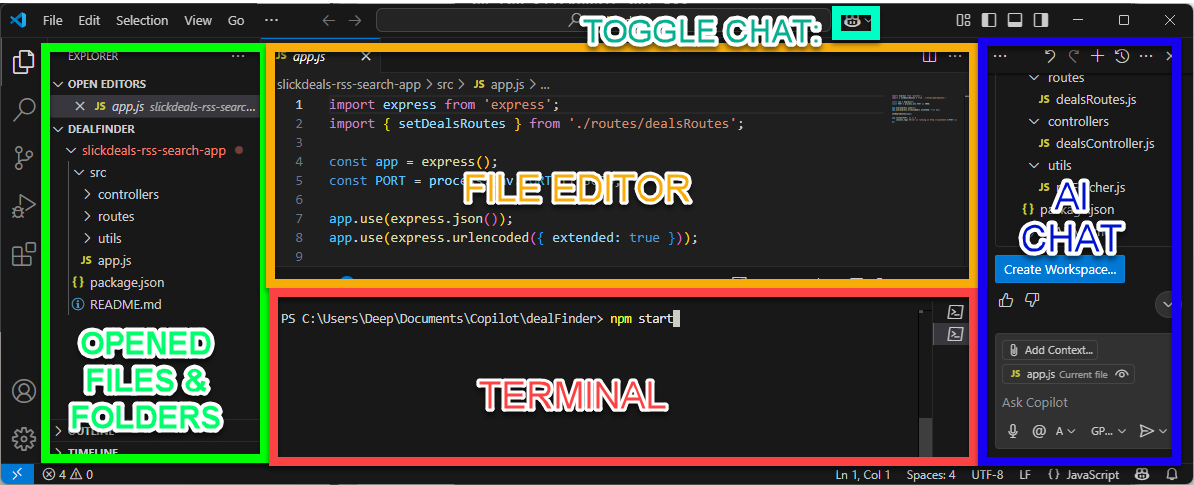
The basic window panes are highlighted above
For the first statement, click the AI Chat window pane, and type:
I want to create a simple javascript app that lets me search for deals using the slickdeals.net RSS.
Github Copilot will respond with a proposed directory structure. Under that it will provide a button that say Create Workspace... Go ahead and click it, and Github Copilot will setup the files in our dealFinder folder. Next, open up your Terminal inside VS Code. This is done by selecting Terminal New Terminal (or CTRL+SHIFT+`). The terminal should open up and point project directory, if not, navigate to your project by typing:
cd "C:\[path of your dealFinder folder]"
For example, my path is C:\Users\Deep\Documents\CopilotFinally. Lastly, to start the server type:
npm start
This will flash some lines on the terminal to let you know the server has been started. If you navigate to http://localhost:3000 on your browser, you will see a “Hello, World!” text on the top left. As you can tell, the AI hasn’t completely listened to what we asked it to do — We still need a frontend! So now, let’s tell it to create a search box giving us the ability to search on Slickdeals.
I continued vibe coding by typing the following in the AI Chat pane of VS Code:
create a search box that allows us to search the slickdeals rss to get deal matches.
The result is shown below:
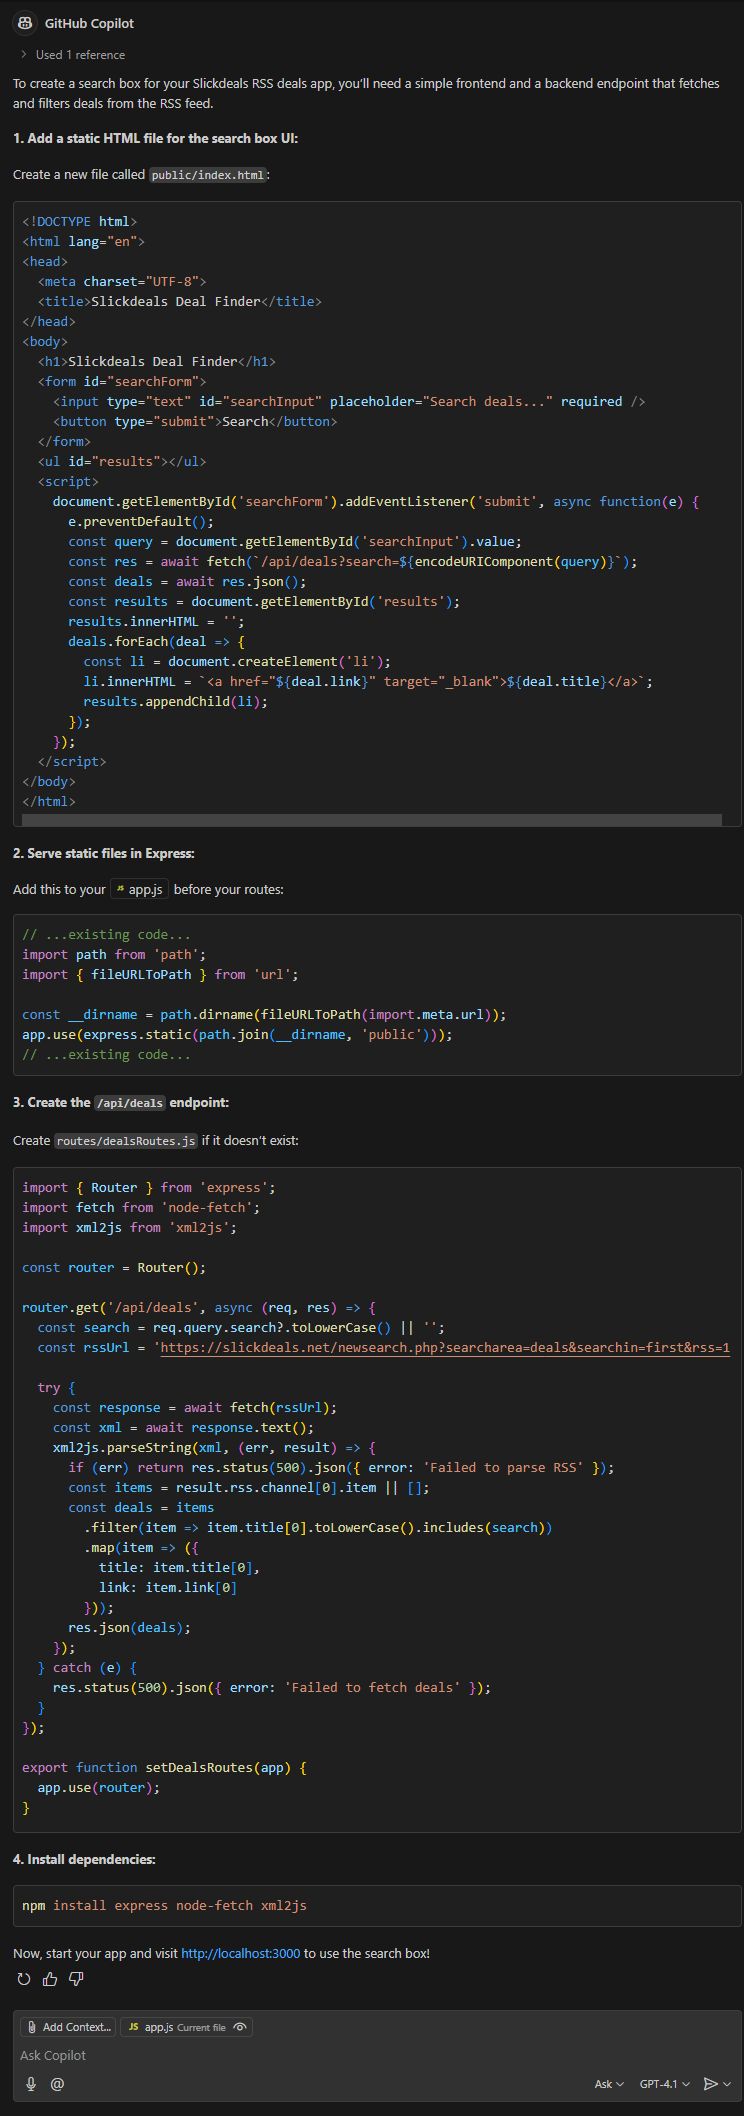
Github Copilot basically instructs us on how to create a front end, and even gives us the code that should go in each of the files. Here, you can ask Github Copilot to create the files for you, and add the corresponding code, however it will not. It will return the names of the files to create, as well as their entire code. However, no matter which way I ask it to — it does not go that far. This is messing up our flow when we’re vibe coding with AI!
In another prompt , I ask for the AI to create the files for me — however instead of creating the files, it gave me the entire code of each file (as stated earlier). When we have that entire code, there is a neat trick I figured out, which allows us to simplify creating files/directories. So go ahead and type:
can you create the files in the correct folder and add the corresponding code to the files?
Instead, the AI just gives you the entire code for all the files it needs to create or update (as stated earlier). Now, for example, you can create the index.html file by simply clicking:

Apply to Editor Button
This is the Apply to Editor button that is visible when you hover your mouse on the top right corner of the code segment of VS Code AI Chat. This will move the focus to the top search bar in VS Code, with the option to create the public folder and index.html file inside:

Now, all you have to do is hit [ENTER] on your keyboard, and save the file. Easy, huh? This button will be your best friend when you’re vibe coding in VS code. It creates files and folders and even updates files (inserts the code in the correct location) –saving you a good chunk of time
If your AI is giving you a hard time, you can also create the folder/file structure manually. We can use the VS code GUI and create files in the necessary locations manually. If you navigate over the folders in the left pane of VS Code, you will see some action buttons pop up:
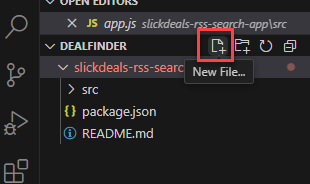
These quick buttons allow us to create a file, folder, or even refresh the folders. So, per AIs request, go ahead and create the files and folders it needs.
Alternative to setup frontend — Vibe coding with VS Code
You can also use Github Copilot AI to generate PowerShell commands to setup our structure. It will spit out some PowerShell commands and give you code for the batch file, but it will not create it for you. That is the limitation for this AI, and most-likely for security reasons. You can copy and paste each command individually in the Terminal of VS Code, or actually create a batch file and run it.
When the Github Copilot AI gets instructions it can’t handle, the response you get when vibe coding, is: “Sorry, I can’t assist with that.”
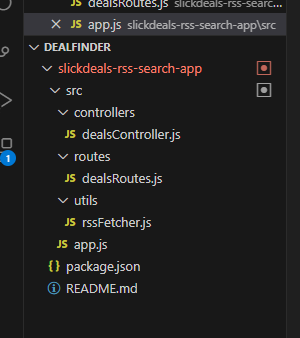
When all the files have been created, your folder structure should look like this:
Go ahead and save the files, then return to the terminal window. Here we need to install the modules and dependencies for our vibe coding, VS Code project. This is done by running:
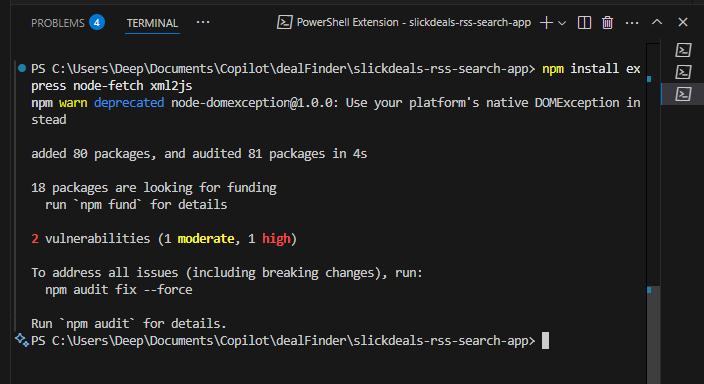
npm install express node-fetch xml2js
Once it’s complete, your terminal window should look similar to this (ignore the warnings for now):
Now, start your server by typing npm start. Make sure you are in your Deal Finder’s root location before doing so. Thereafter, navigate to http://localhost:3000 using your browser.
Error Handling while Vibe Coding in VS Code
When I tried to launch my server, I received an error that the port was already in use:

Errors are, for the most part, easily resolvable using the AI Chat (such as the simple error we received above). Although easily fixable with code, I decided to play along and vibe code. All I had to do is copy and paste the error into the AI Chat pane:
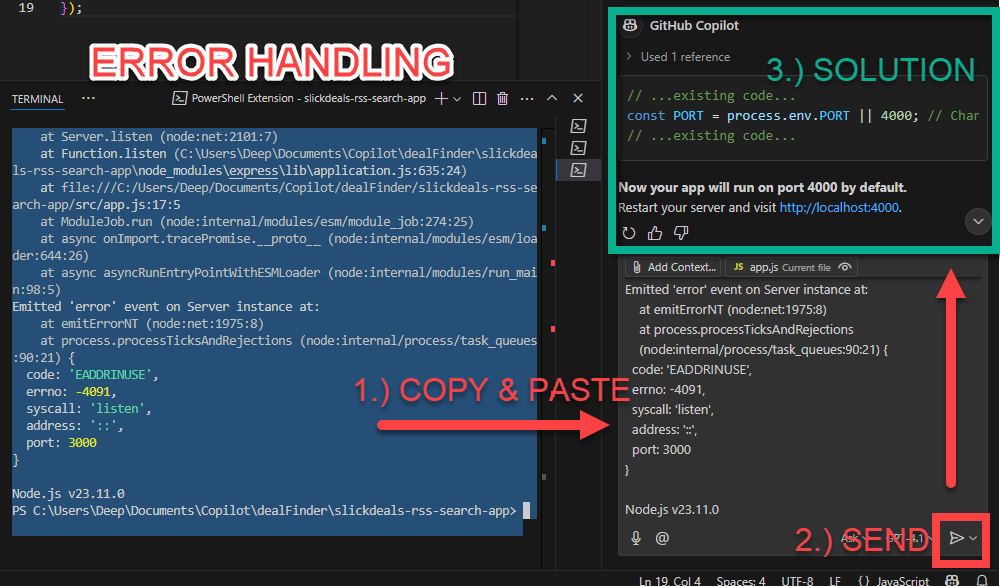
The AI will read the error and find a solution. Once you have the solution, and Github Copilot provides you code, you can easily update the file by clicking the “Apply to…” button:
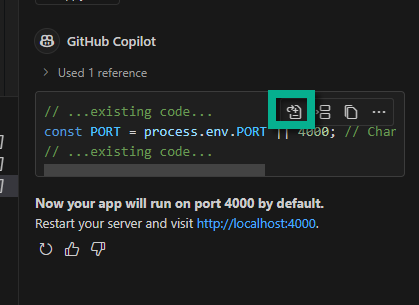
This will automagically update our app.js file to have it run on a different port (4000).
If all is good, the terminal window will show (your port number may vary):
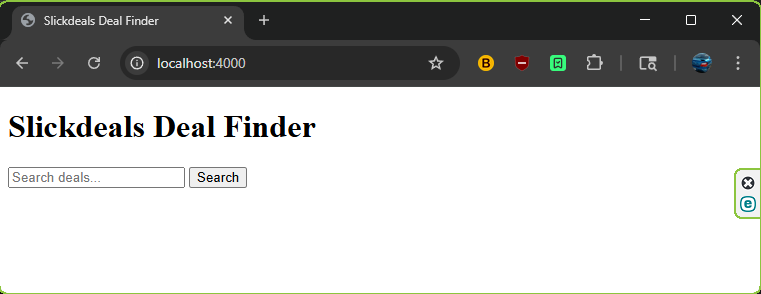
Server is running on http://localhost:4000
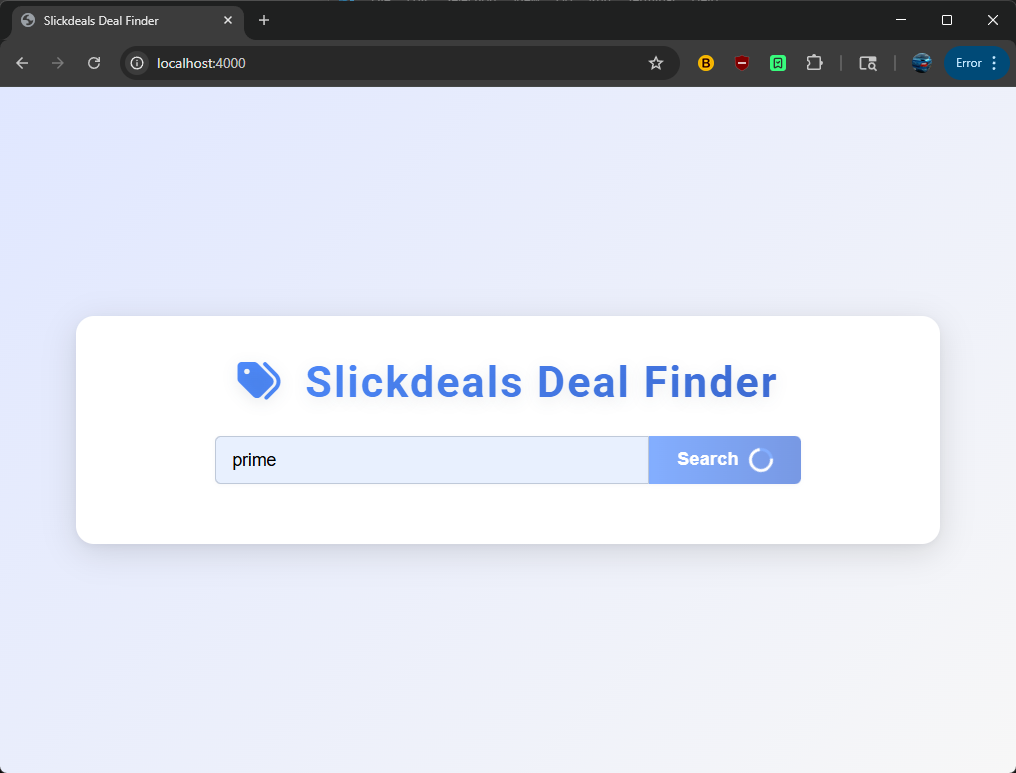
Your Vibe Coding app should look like the following on your web browser:
This is great, we have our app up and running however it’s not that visually appealing. Let’s check the functionality — If we search for “prime” to show all the Amazon Prime deals, it will list the top 10 recent deals and display it in a table:
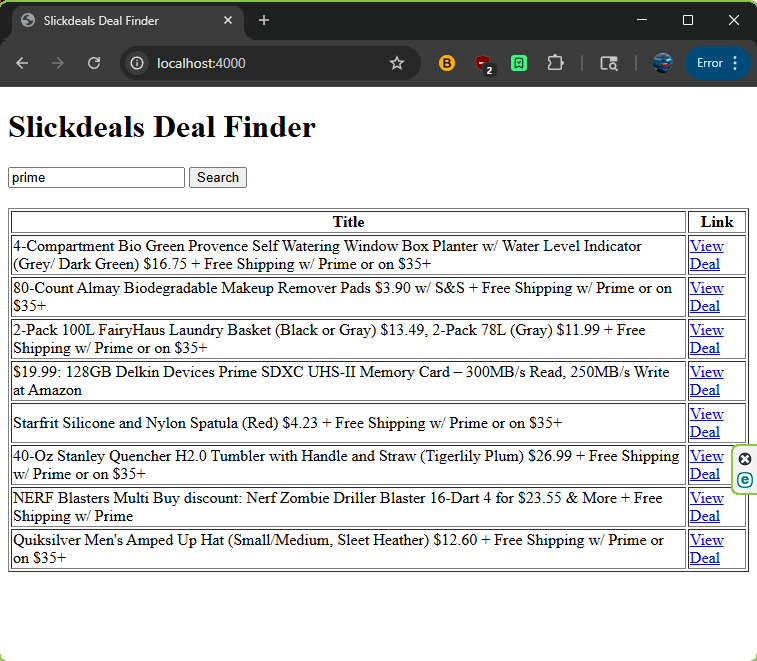
If there aren’t 10 deals available, the app will show however many are available.
Lets modify our app by vibe coding some more metadata fields in our table. Let’s get the table to reflect the price of the item. In order to do this, we can simply type:
Github Copilot will now notify you that there’s no price metadata, however it will modify the dealsRoutes.js file and use regular expressions (regex) to extract the price from the title. Likewise it will provide us code to update our index.html file. To apply the updates, just click on the “Apply to..” button on top of each code set. We are ready to save and test the code again.
Important: For the changes to take effect, remember to restart the server by pressing “CTRL + C” in the Terminal to stop the server. Then start the server again with npm start.
Lets do the same for the date — go ahead and type:
add another field to the table for the date
This should also provide you with an update to your index.html and dealsRoutes.js files. Once again, restart your server for the changes to take effect. We could have taken care of both columns (price and date) by specifying a more detailed prompt for Github Copilot. Test your Deal Finder application again, just to make sure the AI didn’t break anything. If everything is working correct, lets move on to the next section. If not, just handle the error as shown previously.
Prettify our project with Vibe Coding in VS Code
As you can see, our project doesn’t look very eye-catching. Let’s change that by adding some CSS (Cascade Style Sheets). This will allow us to make our app beautiful.
First I decided to format the website by specifying the following:
center the search box and table in the middle of the page and make the maximum width 800px.
Afterwards, I told Github Copilot to:
make the app more appealing by using advance CSS

As you can see (above), Copilot made the app look a lot better on it’s own. Next, I gave it the following instructions in order:
make the "slickdeals deal finder" text more appealing and add a logo
change the "view deal" link to a button and resize the column of the table as necessary
while searching, animate the search button to show that the app is loading
make the text of the view deal button white
I updated the index.html with every modification. Some of these could be combined to make the Deal Finder App even quicker. I chose to do it one by one so i could monitor the results. I didn’t want the AI to go off on a tangent and create something I didn’t like, therefore I micromanaged as I vibe coded in VS Code. The AI can get so far ahead you, that it makes fixing the issues with a prompt even harder. For example, the “View Deal” button was blue and the text was also a shade of blue. I had to go and tell the AI to change it to white.
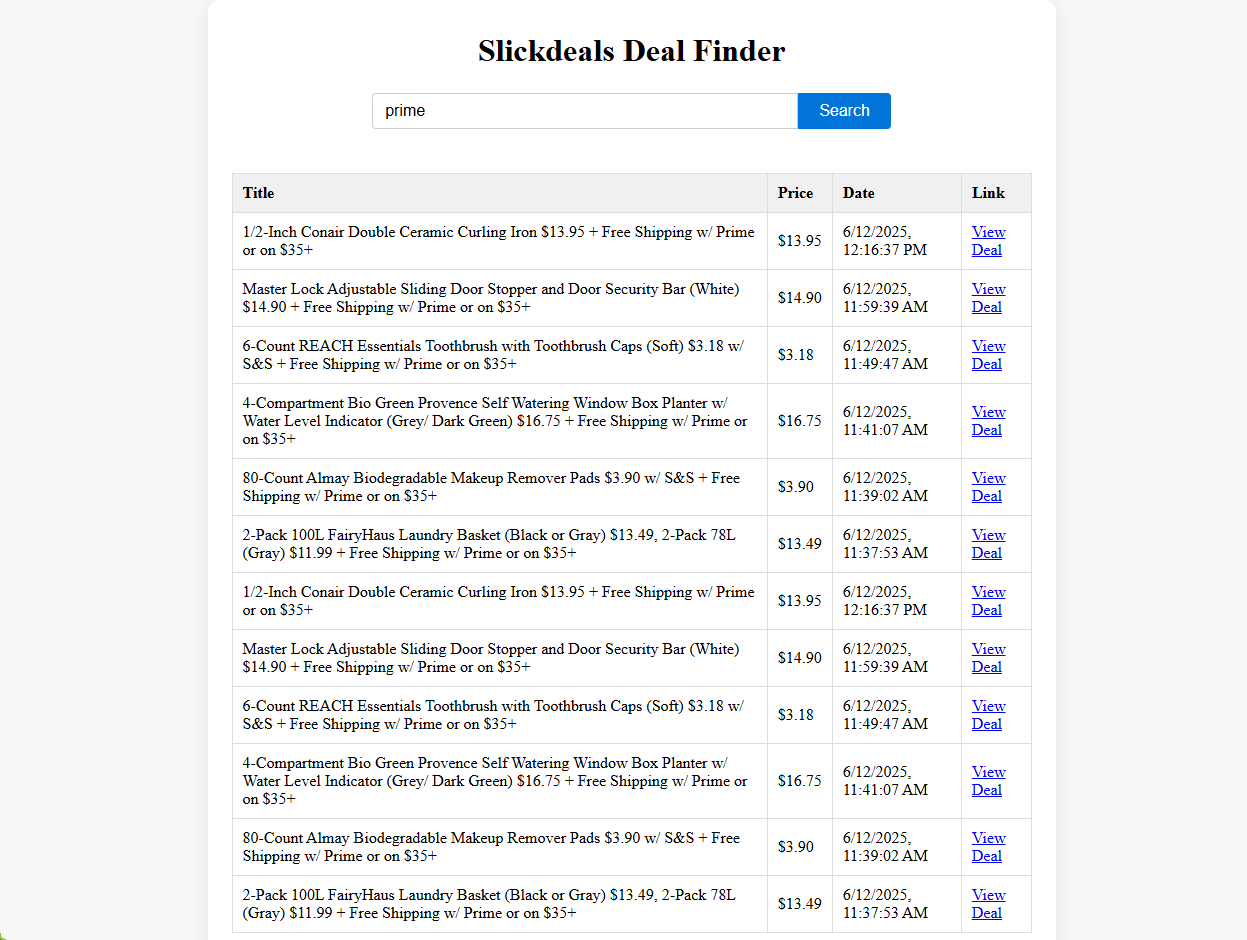
As you can see above, a logo has been added & the search button has a spinner.
Your Github Copilot may use a different color scheme and code than mine. I went though the code and tweaked the colors manually when needed, and came up with this result:
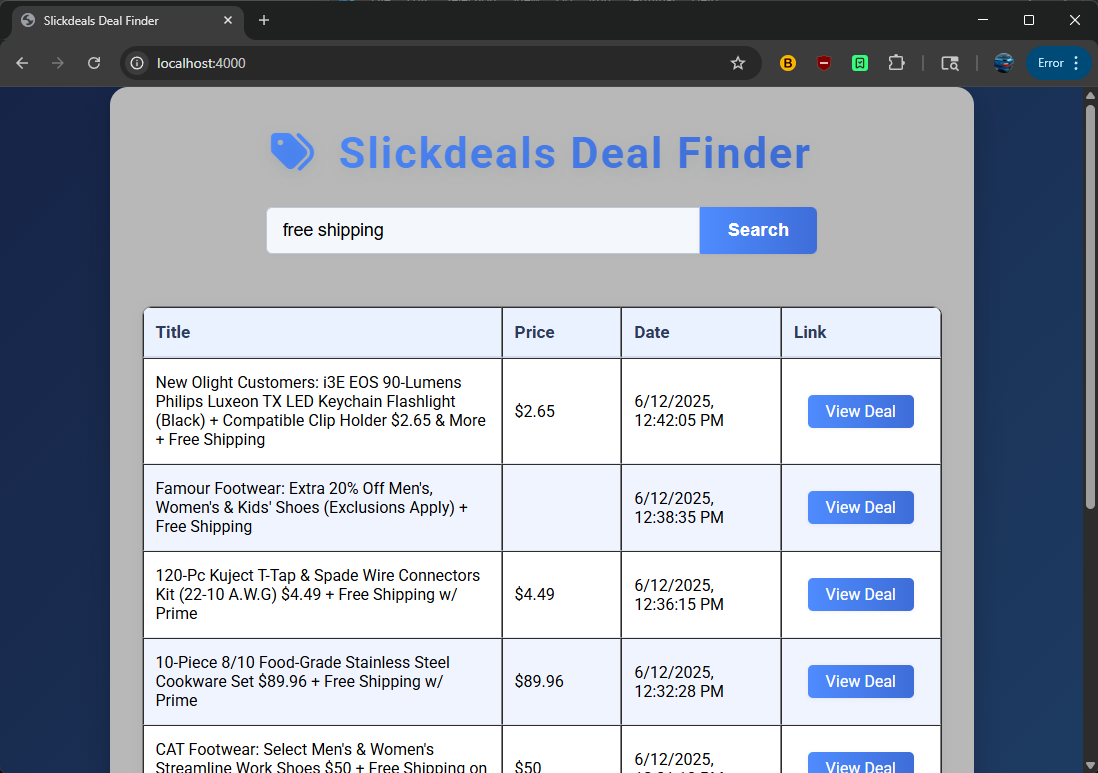
Overall I’m satisfied with the outcome of this application.
Conclusion – Vibe Coding in VS Code
Vibe coding with VS Code is an exciting way to boost your productivity as a developer. By collaborating with AI, you can write code faster, while simultaneously learning better structuring and logic. With the right prompts, you can easily build complex applications while retaining full creative control over your work. Whether you want to hand over the reins to AI or maintain a high level of control over the app’s development, vibe coding offers flexibility to suit your style.
While this approach is especially beneficial for non-coders, enabling them to create apps that were previously beyond their reach, there are certain drawbacks to consider. For instance, beginners may struggle to identify flaws in the code generated by AI. And while AI is a powerful tool, it is not infallible—it can still produce errors, or might miss certain edge cases that experienced developers would catch.
One of the biggest challenges is knowing what to do when something goes wrong, or when your application needs to be updated. Without a solid understanding of the programming language or tech stack you’re using, debugging or making improvements can become difficult. Furthermore, there’s always the risk of leaving vulnerabilities in your code that could be exploited by malicious actors. Protecting users’ private data becomes a critical concern, especially for someone who may not fully understand the importance of security practices.
The Trade-off: Control vs. Convenience
While vibe coding offers many advantages, especially for rapid prototyping, it’s important to acknowledge the trade-off between convenience and control. As someone who has experience with both traditional coding and AI-assisted development through tools like GitHub Copilot, I can say that the experience of vibe coding in VS Code has been fantastic. However, I personally prefer manual coding when the situation allows, as it gives me more direct control over the application’s architecture and logic.
That said, the convenience of vibe coding can be addictive. It allows you to quickly generate code, spot errors, and even get suggestions for optimization. While it’s perfect for rapidly building a working prototype, I prefer using AI-driven assistance sparingly—mainly for code completion and error debugging. This way, I can strike a balance between harnessing the power of AI and maintaining my own involvement in the creative process.
Final Thoughts
Vibe coding offers a unique opportunity for both seasoned developers and those new to coding. While it can empower non-coders to create functional applications, it also highlights the need for a deeper understanding of programming principles. Developers who use AI-driven tools should make an effort to learn the underlying languages and frameworks to ensure they can troubleshoot and secure their projects effectively.
If you’re curious about vibe coding, I highly recommend exploring it further for yourself. Ultimately, the decision of how much to rely on AI should come down to personal preference and the specific needs of your project.


0 Comments