If you’re getting the “low disk space” warning on Windows 10 or 11, ![]() there are multiple ways to solve the issue. You can delete large files, add or remove un-used software or games, or reformat your Hard Drive (HDD). Today, I am going to show you another technique.
there are multiple ways to solve the issue. You can delete large files, add or remove un-used software or games, or reformat your Hard Drive (HDD). Today, I am going to show you another technique.
I chose the path of reinstalling Windows 11, before learning I can also make space by compacting the files that are already on my HDD. Microsoft has a handy command line utility called compact that you can use to make space. However, in this guide I will show you how to make disk space using a GUI version of the compact command.
Although I don’t currently have low disk space, I was able to save 36GB without deleting a single file. I wish I had known before:
 ~36GB saved in 3 minutes!
First, to fix the low disk space warning, you need to download a GUI version that is available on Github:
⬇️ Click here to download Compactor.
After downloading, you can launch the application by double-clicking compacter.exe.

As you can see, the layout is very simple. It basically asks you to Choose a folder. To decide which folder to select, I used a utility called WinDirStat. (see image below) It’s an open Source utility that provides disk usage statistics. More-importantly it shows you how much space each folder is hogging — which the default Windows Explorer does not do. Once you download and run it, it will ask you which drive you want to scan. Go ahead and select whichever drive is running out of space.
I like to use the “Subtree Percentage” and sort it descending. This way the folders using the most space will be at the top. I gradually go through them and see what percentage of space on the root folder, they are hogging. For example:
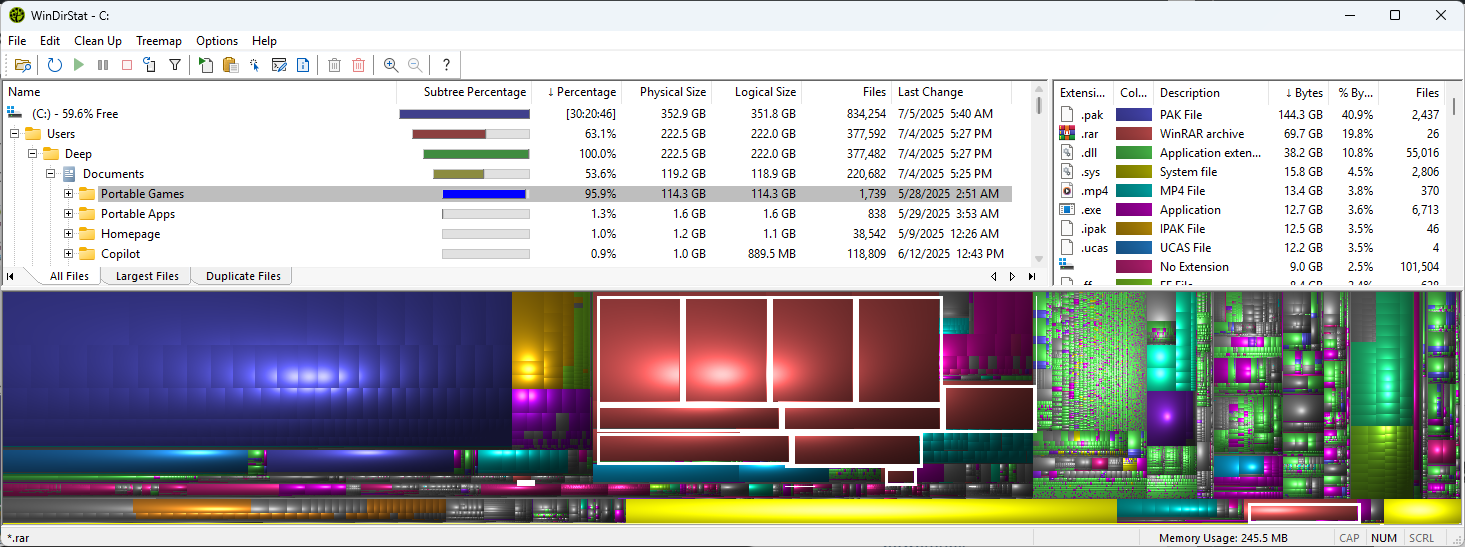
As you can see, my Portable Games folder in the directory C:\Users\Deep\Documents\. It is using 114.3GB on my 1TB Solid-State Drive (SSD). All the folder contains, are 5 very large games in their respective folders. With this finding, I will choose this folder for the Compactor application we downloaded earlier.
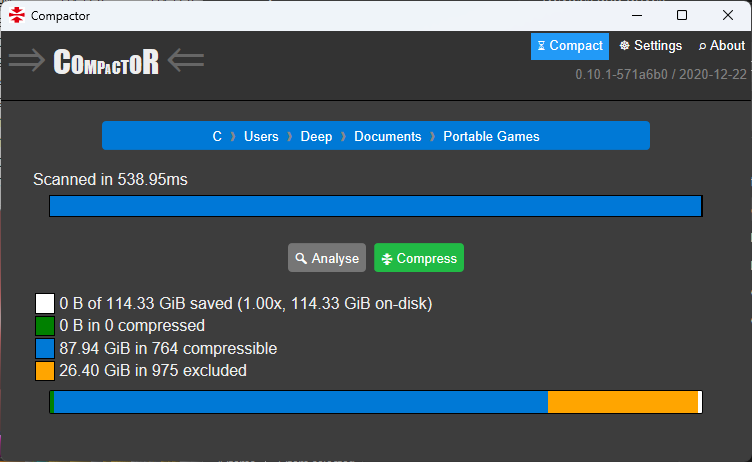
Let’s go ahead and click “Choose a folder” and browse to the Portable Games folder. Compactor should then provide you with some details about your selected folder:
ADDITIONAL INFORMATION
🔲 (white-box) Shows the total amount of GB in the folder in Size on Disk. Size on disk is more important when you’re trying to create space because it has to do with the amount of sectors utilized in the hard drive versus the actual space of the content.
🟩 (Green-box) Shows the amount of compressed files in the folder. Size of 0B means the folder is not compressed and does not contain compressed files.
🟦 (Blue-box) Shows the number of files in the folder that are compressible, out of the total.
🟨 (Yellow-box) shows the size and number of files that will be excluded in this compression task. Compactor has a list of files that are excluded, for one reason or another. You can view and modify these files under “Settings,” on the top-right of the Compactor window.
📈 The bottom bar shows a graph of these colors based on the total file count.
Verify everything seems correct, and, finally, hit the “Compress” button. Now this may take some time depending on how large the files are, if they can compress, how much they can compress, and your hardware specs. This is a perfect time to take a break..☕
RESULTS
Once you get back, you will notice Compactor is complete and waiting for you at this window:
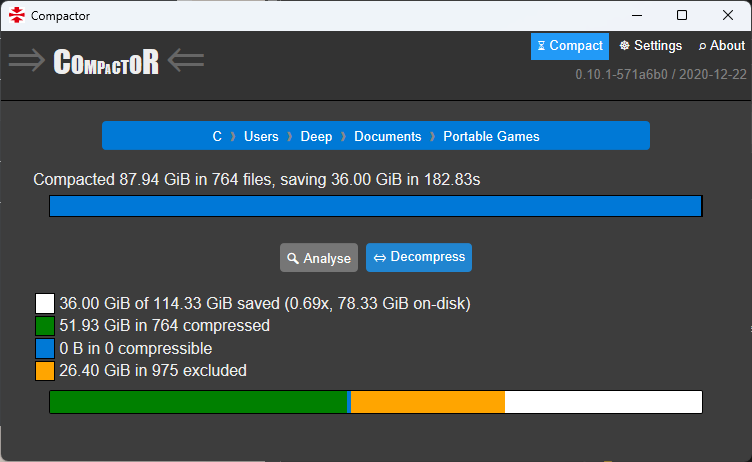
Above the progress bar, it says “Compacted 87.84 GiB in 764 files, saving 36.000 GiB in 182.83s”. That is around 3 minutes! Also, on the bottom, it displays a break-down of the Completed results (see ‘Additional Info’ above).
The most important information, is that it saved me 36GiB of space and I didn’t have to delete a single thing! Otherwise I would be pulling my hair out(whatever I have left), trying to make that much space on a drive. However, let’s verify the results:
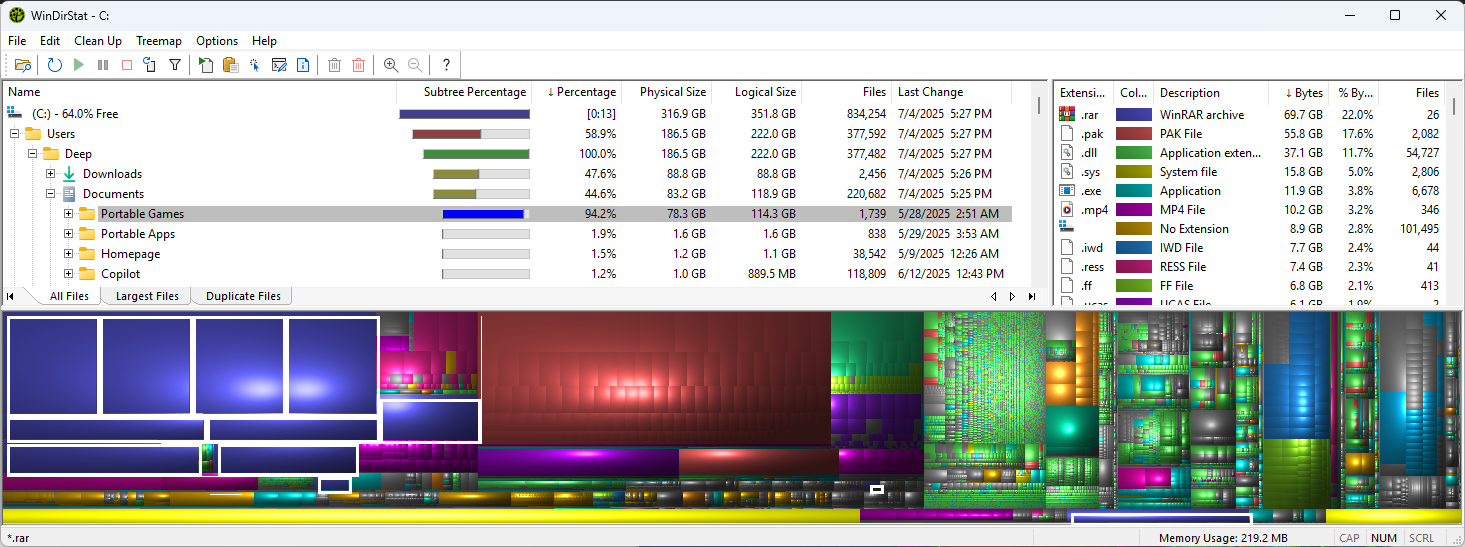
Here are the results from WinDirStat:
Here are my C:\ drive properties before and after running compactor:

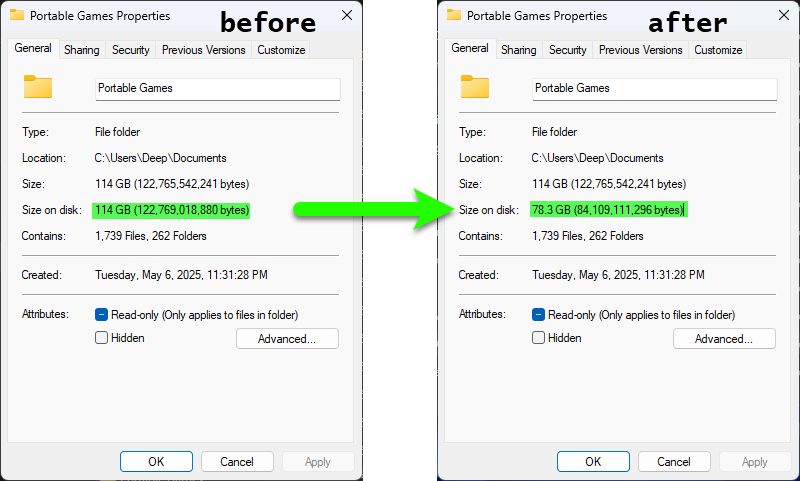
Finally, here are my Portable Games folder properties before and after:
Important: If any issues arise after compacting, you can always uncompact the results by selecting the same folder in the utility. This time, the “Compact” button turns into the “Decompress” button. No harm done.
Conclusion
In conclusion, you can see it has saved me a lot of space on my SSD. As stated previously, your results may vary depending on your hardware, and files you’re attempting to compress. Running WinDirStat is a great way to locate folders that are taking up a lot of space. And the Compactor GUI tool is a easy way of utilizing the built-in compact command.
That being said, I can still launch all the games in my portable games folder normally, and they function normally too. As others, I did not see a decrease in launching or loading times for the games. If any issues arise after compacting, you can uncompact the folders the same way.


0 Comments